System / Application ZEISS T-SCAN
industry Car manufacturer
client BMW Group Munich factory
task
The BMW Group Munich plant has 1,000 cars off the assembly line every day. Only the BMW 3 Series and the BMW 4 Series are built in the capital city of Bavaria. These models include the BMW 3 Touring, the BMW 4 Coupé and the M4 Coupé, which are assembled only here and then exported to all parts of the world.
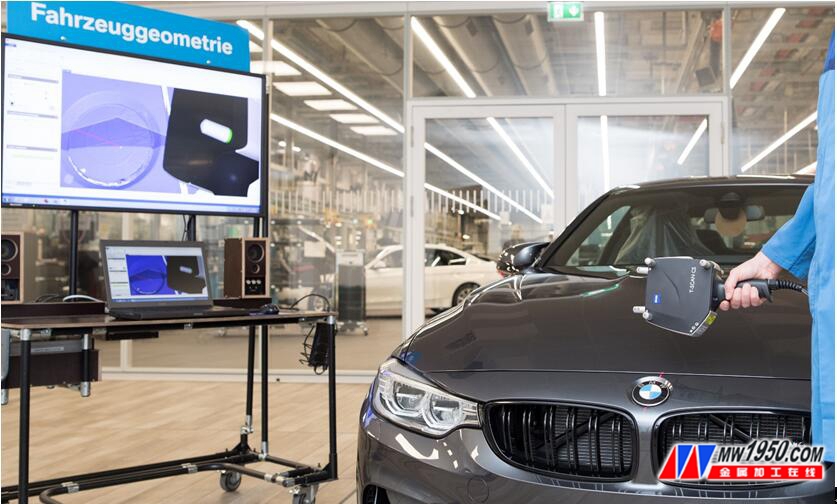
Because the front end has a decisive influence on the overall shape of the vehicle, BMW places great emphasis on vehicle assembly and strict seam planning. For a long time, seams have only been tested with gap gauges, which effectively show if the seams are out of tolerance, but are unable to determine the cause of the error. In order to avoid this problem, vehicles with obvious seams and gaps must be driven into the measurement room for measurement. To optimize the assembly process, the department needed a digital system that was used directly after the final assembly to provide the same accurate measurements as in the measurement chamber.
Solutions and products
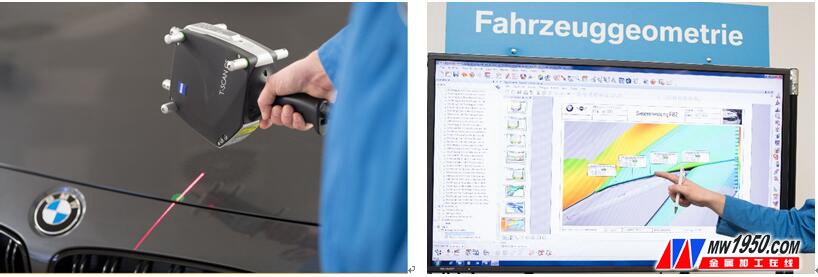
The handheld Zeiss T-SCAN laser scanner provides fast, intuitive and extremely accurate 3D scanning. Handheld scanners, tracking cameras and touch probes work perfectly together. This modular construction system can be used in a variety of applications. It provides extremely fast scanning speeds and accurate measurement results. This is because the laser line produced by the handheld scanner samples the surface of the component in a high-speed, non-contact manner. Record 210,000 points per second: more than any other conventional method. Since the tracking camera can detect the position of the scanner, the 3D surface data can be calculated by means of triangulation. With the touch probe, additional single points can also be recorded tactilely to record hole edges or unusual depressions. Therefore, the data recorded by the ZEISS T-SCAN can accurately describe the actual state. It is then compared to the nominal specifications determined in the CAD model. Deviations can be easily detected through extensive pseudo-color contrast.

The ZEISS T-SCAN meets the most stringent ergonomic requirements. This also means that it can be used for scanning of larger components without fatigue.
The data recorded by the ZEISS T-SCAN therefore accurately describes the actual state and immediately detects the deviation through extensive pseudo-color contrast.
The ZEISS T-SCAN also meets the most stringent ergonomic requirements, so it is also possible to scan larger components without fatigue. The Zeiss system features a lightweight, compact scanner housing that makes it easy to record data in hard-to-reach areas. Intuitive, simple operations expand the range of applications or user groups.
Results/benefits for customers
Since March 2016, three assemblers in Munich have tested the front and rear ends of six completed vehicles on average each day. What is measured here is the seam and slit width of a two-part and rounded radiator grille (so-called BMW double kidney grille), headlights and bumpers. For this reason, after a short training, the ZEISS T-SCAN operator can record 80-90 measuring points at the front of each model and 40 measuring points at the end. By comparing the recorded actual values ​​with the nominal values ​​in the CAD model, it is possible to determine if there are inaccurate contours at the front end and the tail end within two hours. In this way, quality engineers in assembly and body manufacturing can solve problems faster. For quality and process engineers, the Zeiss system is an important prerequisite for more efficient control of plant and supplier processes. Thanks to the light weight of the ZEISS T-SCAN system, it is possible to measure instruments that are decisive for front-end and end-end assembly directly in the production hall.

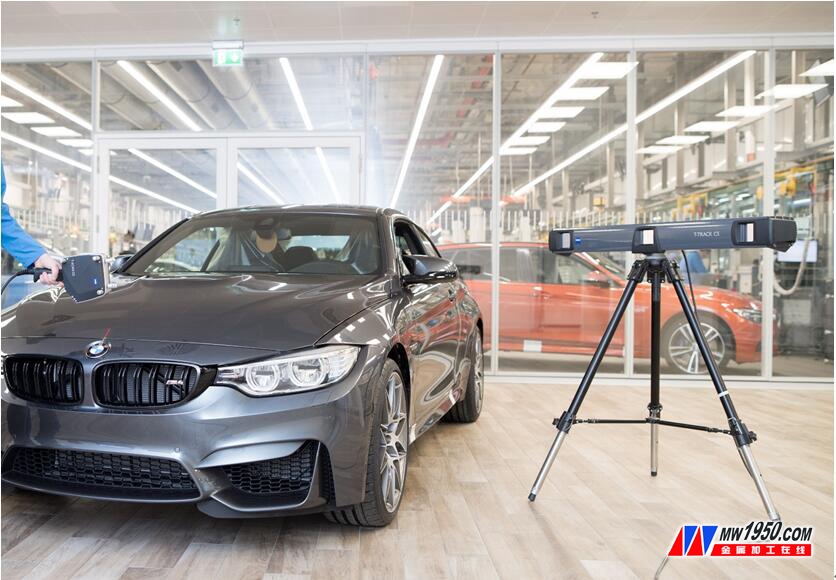
The laser scanner records 210,000 points per second. The tracking camera (on the right side of the photo) detects the position of the scanner. This enables the calculation of 3D surface data by means of triangulation.
Advantage/statement
Fast error detection with accurate measurement results
Easy to operate, can be operated by the assembly worker
The system is lightweight and can prevent errors by testing instruments in the production floor.
Stainless Steel Bread Basket
Bread Basket,stainless wire basket,stainless wire bread basket,Metal Wire Bread Basket,steel bread basket,etc. we offered that you can trust. Welcome to do business with us.
Kichen Rack is made of high quality 304 stainless steel, This kind of material steel luxury, never rust, resist corruption, easily clean, safe, healthy and durable. Prevent rust or chemicals from contaminating food and damaging health
Stainless Steel Wire Bread Basket,Metal Wire Bread Basket,Creative Bread Basket,Versatile Bread Basket
Shenzhen Lanejoy Technology Co.,LTD , https://www.wire-spring.com
